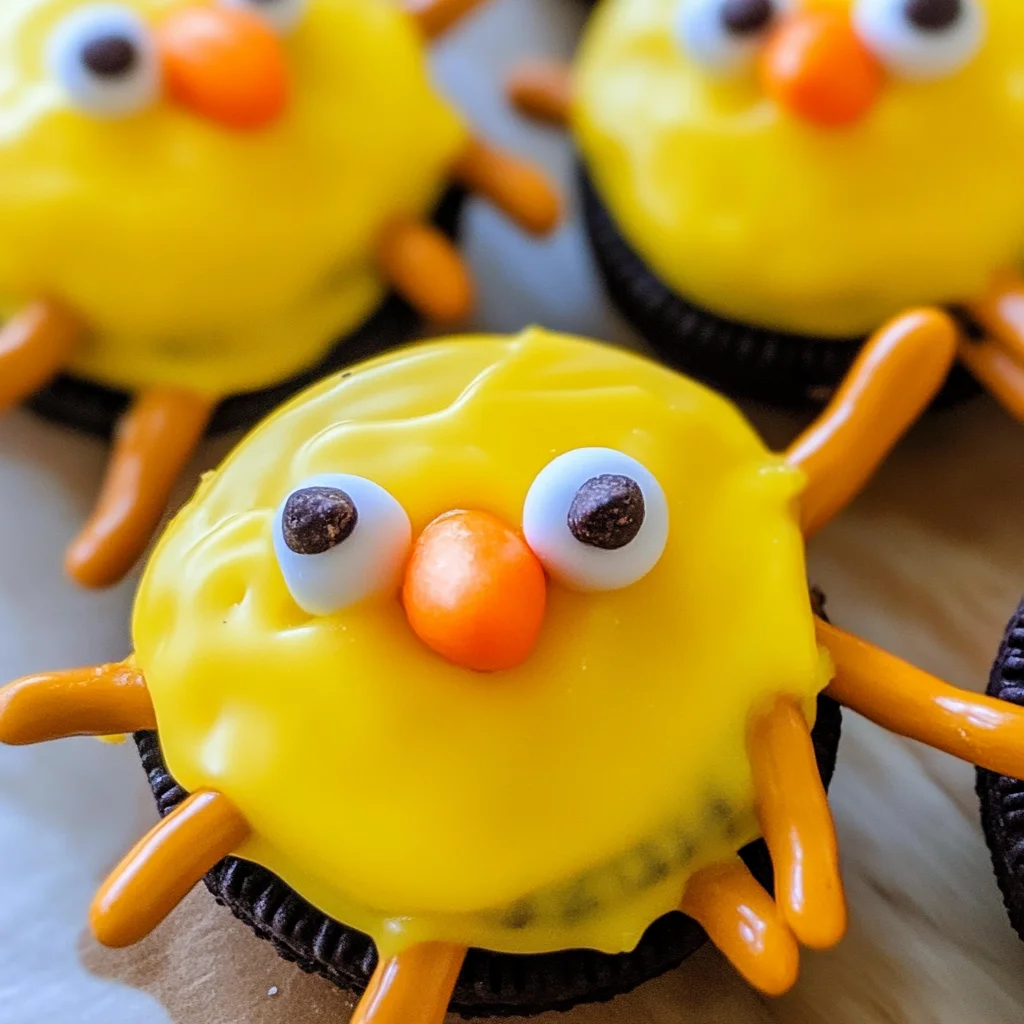
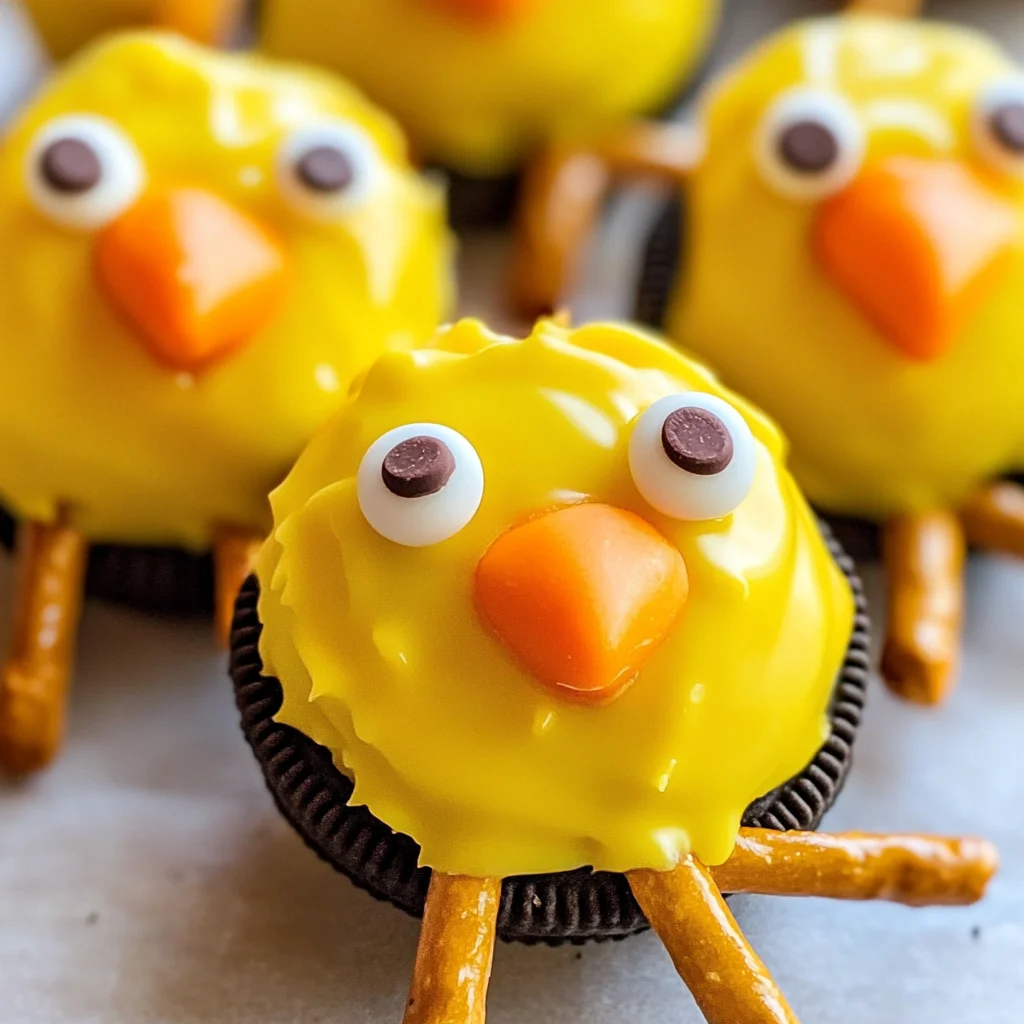
Oreo Easter Chicks are a delightful treat that adds sweetness and whimsy to your Easter celebrations. These adorable little chicks, made from Oreo cookies, yellow candy melts, and pretzel sticks, are perfect for parties, family gatherings, or even as a fun project with kids. Their vibrant color and charming appearance make them stand out on any dessert table.
Why You’ll Love This Recipe
- Easy to Make: With simple steps and minimal ingredients, anyone can whip up these cute treats in no time.
- Fun for All Ages: Kids will love helping out in the kitchen, making it a great bonding activity.
- Customizable Appearance: You can personalize the chicks with different colors or decorations to match your theme.
- Perfect for Any Occasion: While ideal for Easter, these treats can brighten up any gathering or celebration.
- Delicious Flavor: The combination of creamy Oreos and sweet candy melts is irresistible.
Tools and Preparation
To create your Oreo Easter Chicks successfully, you’ll need some essential tools. Having the right equipment makes the process smoother and more enjoyable.
Essential Tools and Equipment
- Baking sheet
- Wax paper
- Microwave-safe bowl
- Spoon or fork
Importance of Each Tool
- Baking sheet: Provides a flat surface to cool your dipped Oreos without sticking.
- Wax paper: Keeps your treats from sticking to surfaces while they set.
- Microwave-safe bowl: Ideal for melting candy melts evenly without burning.
- Spoon or fork: Useful for dipping Oreos into melted candy smoothly.
Ingredients
Oreo Easter Chicks feature easy-to-find ingredients that deliver both flavor and fun.
For the Chicks
- 1-2 bags yellow candy melts
- 1 package double-stuff oreos
- mini chocolate chips
- thin pretzel rods (broken into short pieces)
- orange decorating gel or orange candy melts
How to Make Oreo Easter Chicks
Step 1: Melt the Candy Melts
Begin by melting the yellow candy melts according to the package instructions.
Step 2: Dip the Oreos
Once melted, take each Oreo cookie and dip it into the yellow candy melts until fully covered. Place each dipped cookie on a piece of wax paper.
Step 3: Add Legs and Eyes
Quickly insert two pretzel pieces into each dipped Oreo to serve as legs. Then, add two mini chocolate chips on top for eyes.
Step 4: Create Beaks
Use orange decorating gel or melted orange candy melts to draw small beaks on each chick.
Step 5: Set in Refrigerator
Place your finished chicks in the refrigerator to set until firm.
Now you have a batch of adorable Oreo Easter Chicks ready to impress! Enjoy sharing this sweet treat with friends and family during your celebrations.
How to Serve Oreo Easter Chicks
Oreo Easter Chicks are not only visually delightful but also versatile in serving. These treats can be presented in various fun ways that enhance their festive charm. Below are some creative serving suggestions to make your presentation stand out.
On a Festive Platter
- Arrange the Oreo Easter Chicks on a colorful platter surrounded by edible grass or shredded coconut to mimic a nest.
In Individual Cups
- Serve each chick in small clear cups for a fun grab-and-go option. This makes them easy for guests, especially kids, to enjoy during gatherings.
As Party Favors
- Place each Oreo Easter Chick in a cellophane bag tied with pastel ribbons. This is a sweet treat for guests to take home after an Easter celebration.
With Fun Labels
- Create cute labels for each chick that describe the treat. This adds a personalized touch and can include fun facts about Easter.
How to Perfect Oreo Easter Chicks
To ensure your Oreo Easter Chicks turn out perfectly, consider these helpful tips. These small adjustments can greatly enhance your results and make the preparation process smoother.
- Choose quality candy melts: Using high-quality yellow candy melts will result in a smoother coating and better flavor.
- Work quickly: After dipping the Oreos, add the pretzel legs and chocolate chip eyes immediately while the coating is still wet.
- Chill effectively: Allow enough time in the refrigerator for the candy coating to set completely before serving.
- Customize decorations: Feel free to add other edible decorations like sprinkles or colored sugars for extra visual appeal.
Best Side Dishes for Oreo Easter Chicks
Pairing side dishes with your Oreo Easter Chicks can create a balanced and festive meal. Here are some delightful options that complement these sweet treats perfectly.
- Spring Salad: A fresh mix of greens topped with seasonal veggies adds a light touch to your dessert spread.
- Fruit Skewers: Colorful fruit skewers made with strawberries, melons, and grapes provide a refreshing contrast.
- Vegetable Platter: Crisp vegetables served with hummus or ranch dressing offer a savory balance to the sweetness of the chicks.
- Cheese Board: A variety of cheeses paired with crackers and nuts can satisfy savory cravings during dessert time.
- Mini Quiches: These bite-sized delights can be filled with veggies or cheese, making them a hearty addition for an Easter brunch.
- Pasta Salad: A cold pasta salad with fresh herbs and veggies adds flavor while being easy to prepare ahead of time.
- Deviled Eggs: Classic deviled eggs can bring an elegant touch to your spread while keeping it festive.
- Sweet Potato Fries: Crispy sweet potato fries provide a delicious contrast to the sugary treats, perfect for balancing flavors.
Common Mistakes to Avoid
When creating your Oreo Easter Chicks, it’s easy to make a few common mistakes. Here are some tips to keep your treats looking and tasting their best.
- Boldly skip the cooling: Not allowing the melted candy melts to cool slightly before dipping can result in a runny mess. Let them cool for a minute for better coating.
- Boldly ignore the wax paper: Skipping the wax paper can lead to sticking issues. Always use it to ensure easy removal once your chicks are set.
- Boldly overload with decorations: Adding too many candies or decorations may overwhelm the design. Keep it simple with two mini chocolate chips for eyes and an orange beak.
- Boldly forget about storage: Improper storage can affect texture and taste. Store them in an airtight container at room temperature away from sunlight.
- Boldly skimp on chilling time: Not placing them in the refrigerator long enough may leave your chicks soft. Chill for at least 15 minutes until fully set.
Storage & Reheating Instructions
Refrigerator Storage
- Store Oreo Easter Chicks in an airtight container.
- They will stay fresh for up to 1 week in the refrigerator.
Freezing Oreo Easter Chicks
- Place them in a freezer-safe container or bag.
- They can be frozen for up to 2 months.
Reheating Oreo Easter Chicks
- Oven: Preheat to 250°F (121°C) and warm for about 5-10 minutes, covered with foil to avoid melting decorations.
- Microwave: Heat on low power for 10-15 seconds just until slightly warm; avoid overheating.
- Stovetop: Not recommended as direct heat could ruin decorations.
Frequently Asked Questions
Here are some common questions about making Oreo Easter Chicks.
How do I customize my Oreo Easter Chicks?
You can easily customize your Oreo Easter Chicks by using different colors of candy melts or adding sprinkles for extra flair!
Can I make these Oreo Easter Chicks ahead of time?
Yes! You can prepare these treats a few days in advance and store them properly to keep them fresh.
What if I can’t find yellow candy melts?
If yellow candy melts aren’t available, you can use white candy melts mixed with a few drops of food coloring instead.
Are there any alternatives to using pretzel rods?
Yes! You can substitute pretzel rods with thin breadsticks or even colored licorice for fun legs!
Final Thoughts
Oreo Easter Chicks are a delightful and creative treat perfect for any spring celebration. Their cute design and sweet flavor make them a hit among kids and adults alike. Feel free to customize them with various colors or decorations to match your theme. Try making this fun recipe today!
Oreo Easter Chicks
- Total Time: 30 minutes
- Yield: Approximately 12 servings 1x
Description
Create adorable Oreo Easter Chicks with this easy recipe! Perfect for spring celebrations, these treats are fun and delicious. Try it today!
Ingredients
- 1–2 bags yellow candy melts
- 1 package double-stuffed Oreos
- mini chocolate chips
- thin pretzel rods (broken into short pieces)
- orange decorating gel or orange candy melts
Instructions
- Melt the yellow candy melts according to package instructions.
- Dip each Oreo cookie into the melted candy until fully coated and place on wax paper.
- Insert two pieces of pretzel into each dipped Oreo for legs and add mini chocolate chips for eyes.
- Use orange decorating gel or melted orange candy melts to create beaks on the chicks.
- Refrigerate until set.
- Prep Time: 20 minutes
- Cook Time: 10 minutes
- Category: Dessert
- Method: N/A
- Cuisine: N/A
Nutrition
- Serving Size: 1 serving
- Calories: 150
- Sugar: 14g
- Sodium: 70mg
- Fat: 5g
- Saturated Fat: 2g
- Unsaturated Fat: 3g
- Trans Fat: 0g
- Carbohydrates: 24g
- Fiber: 0g
- Protein: 1g
- Cholesterol: 0mg

Leave a Comment