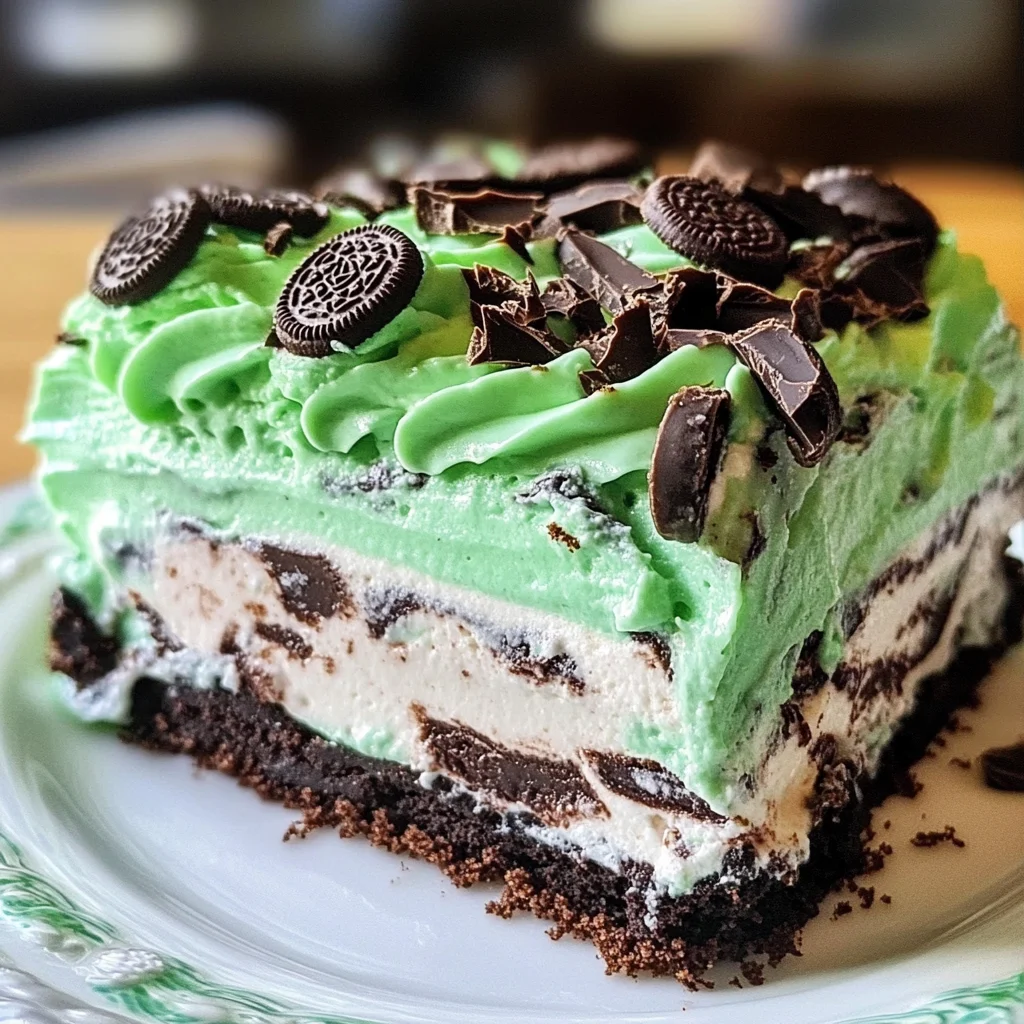
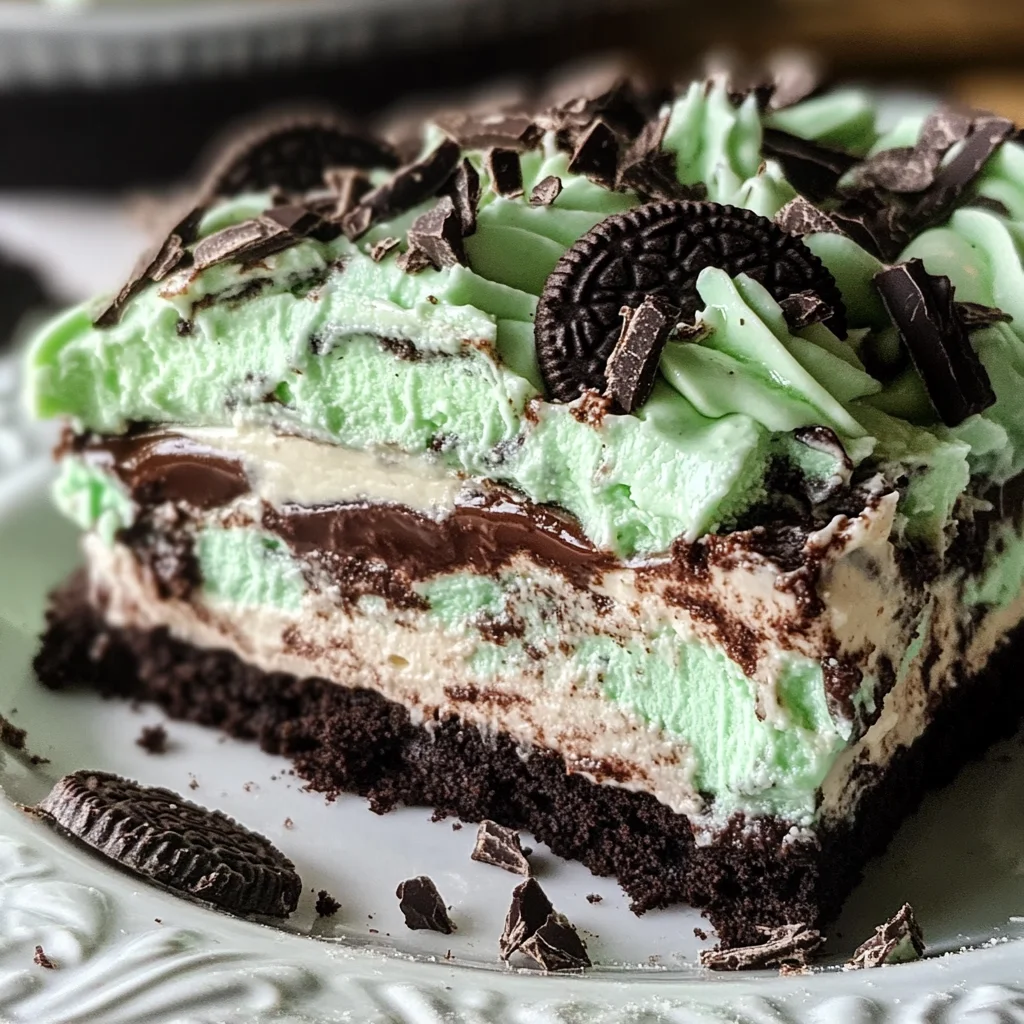
This Heavenly Mint OREO Dessert is a delightful treat that combines rich chocolate pudding with the refreshing taste of mint. Perfect for parties, family gatherings, or just a sweet indulgence at home, this no-bake pie stands out for its creamy texture and vibrant flavor. You’ll love how easy it is to prepare, making it an ideal choice for both novice and experienced bakers!
Why You’ll Love This Recipe
- No-Bake Convenience: This dessert requires no baking, allowing you to whip it up quickly without heating your kitchen.
- Decadent Flavor: The combination of chocolate and mint creates a heavenly taste that will satisfy your sweet tooth.
- Crowd-Pleaser: Perfect for any occasion, this dessert will impress guests and family alike with its beautiful layers and delicious flavors.
- Customizable: Feel free to add your favorite toppings or adjust the mint flavor to suit your preference.
- Quick Prep Time: With just 20 minutes of prep time, you can have this showstopper ready in no time.
Tools and Preparation
To create this Heavenly Mint OREO Dessert, having the right tools on hand makes the process smoother and more enjoyable.
Essential Tools and Equipment
- Mixing bowls
- Electric mixer
- Rolling pin
- Large zipper bag
- 9×11 baking dish
Importance of Each Tool
- Mixing bowls: These are essential for combining the ingredients efficiently without spills.
- Electric mixer: A must-have for achieving a smooth cream cheese mixture quickly and easily.
Ingredients
This Heavenly Mint OREO Dessert is so decadent and fun to make–it’s a no-bake pie that you just have to taste to understand my obsession.
For the Pudding Layer
- 2 small packages instant chocolate pudding
- 3 ¼ Cup(s) milk
For the Cream Cheese Layer
- 1 8-ounce package cream cheese (room temperature)
- 1 Cup(s) powdered sugar
- 2 8-ounce containers whipped topping
For the Crust and Topping
- 1 package mint Oreos
- ½ Cup(s) butter (melted)
- Green food coloring
How to Make Heavenly Mint OREO Dessert
Step 1: Prepare the Chocolate Pudding
Whisk together instant chocolate pudding and milk in a large bowl until set.
Step 2: Make the Cream Cheese Mixture
In a second bowl, cream together the cream cheese and powdered sugar with an electric mixer until smooth.
Step 3: Combine Whipped Topping and Food Coloring
Fold in one tub of whipped topping along with green food coloring into the cream cheese mixture. Stir gently until well combined. Set aside.
Step 4: Crush the Oreos
Place mint Oreo cookies into a large zipper bag. Using a rolling pin, crush them into fine crumbs.
Step 5: Create the Cookie Crust
Add half of the crushed Oreos into the bottom of a 9×11 baking dish. Pour melted butter evenly over the crushed cookies. Stir well to combine and press firmly into the bottom of the pan.
Step 6: Layer with Cream Cheese Mixture
Spread the cream cheese mixture evenly over the crushed cookie crust, ensuring complete coverage.
Step 7: Add Chocolate Pudding Layer
Carefully pour and spread the prepared chocolate pudding evenly over the cream cheese layer.
Step 8: Finish with Green Whipped Topping
In a separate medium bowl, mix green food coloring into the second container of whipped topping. Spread this green whipped topping evenly over the chocolate pudding layer.
Step 9: Top with Remaining Oreos
Sprinkle any remaining crushed Oreos on top for added texture and flavor.
Step 10: Chill Before Serving
Place in the refrigerator to chill for at least two hours before serving. Enjoy every decadent bite!
How to Serve Heavenly Mint OREO Dessert
This delightful dessert is perfect for any gathering or special occasion. It’s easy to serve and will impress your guests with its vibrant colors and rich flavors.
Individual Portions
- Serve in small cups for a fun, personal touch. This makes it easy for guests to enjoy their own servings.
Family Style
- Present the dessert in the baking dish. Allow guests to scoop out their portions, creating a casual and communal atmosphere.
Garnished Plates
- Plate individual servings and garnish with extra crushed Oreos or mint leaves for an elegant presentation. This adds a nice touch of color and texture.
With Ice Cream
- Pair each slice with a scoop of vanilla or mint ice cream. The creamy texture complements the dessert perfectly.
How to Perfect Heavenly Mint OREO Dessert
To achieve the ultimate version of this dessert, follow these helpful tips for an even better result.
- Use Room Temperature Ingredients: Make sure your cream cheese is at room temperature for a smoother consistency when mixing.
- Adjust Sweetness: Taste and adjust the powdered sugar according to your preference. You can lessen or increase it based on how sweet you like your desserts.
- Chill Thoroughly: Allow the dessert to chill for at least two hours. This helps all flavors meld together beautifully.
- Layer Carefully: When layering, spread evenly to ensure each bite offers a taste of all components.
- Experiment with Colors: You can add more green food coloring if you want a deeper hue. Just be careful not to overdo it!
Best Side Dishes for Heavenly Mint OREO Dessert
Completing your meal with complementary side dishes enhances the overall experience. Here are some great options:
- Fresh Fruit Salad: A mix of seasonal fruits offers a refreshing contrast to the rich dessert.
- Whipped Cream Parfaits: Light and airy whipped cream layered with berries make a lovely accompaniment.
- Chocolate-Dipped Strawberries: These sweet treats add a touch of elegance and pair nicely with mint flavors.
- Mini Cheesecakes: Bite-sized cheesecakes provide a different texture while still being creamy and delicious.
- Minty Lemonade: A refreshing drink that complements the mint flavor in the dessert.
- Nutty Granola Bars: These provide a crunchy texture that balances out the smoothness of the Heavenly Mint OREO Dessert.
- Coffee or Tea: A warm beverage helps cleanse the palate after enjoying this sweet treat.
Common Mistakes to Avoid
When making your Heavenly Mint OREO Dessert, there are a few common pitfalls to watch out for. Here are some mistakes to avoid for the best results:
-
Incorrect pudding consistency: Make sure you whisk the instant chocolate pudding and milk thoroughly until it sets. A lumpy mixture will affect the dessert’s texture.
-
Overmixing cream cheese: When creaming the cream cheese and powdered sugar, mix just until smooth. Overmixing can lead to a runny filling.
-
Not chilling long enough: Allowing your dessert to chill for at least two hours is essential. This helps it set properly and enhances the flavors.
-
Skipping the food coloring: Adding green food coloring not only enhances the appearance but also ties in with the mint theme. Don’t skip this step for presentation!
-
Ignoring cookie crust compression: Pressing down the crushed Oreos firmly is crucial. A loose crust may fall apart when serving.
Storage & Reheating Instructions
Refrigerator Storage
- Store in an airtight container to keep it fresh.
- It can last for up to 5 days in the refrigerator.
Freezing Heavenly Mint OREO Dessert
- Wrap tightly in plastic wrap and then aluminum foil.
- It can be frozen for up to 2 months, but the texture may change slightly upon thawing.
Reheating Heavenly Mint OREO Dessert
- Oven: Not recommended, as this dessert is best served chilled.
- Microwave: You can microwave individual servings on low power for about 10-15 seconds if desired, but it’s meant to be enjoyed cold.
- Stovetop: Not applicable; this dessert does not require stovetop reheating.
Frequently Asked Questions
Here are some common questions about making Heavenly Mint OREO Dessert:
Can I use different flavors of Oreos?
Yes! You can experiment with other Oreo flavors to create variations of this dessert while still keeping it delicious.
How do I make a gluten-free version?
You can use gluten-free Oreos instead of regular ones to make this Heavenly Mint OREO Dessert gluten-free and equally delightful!
How long can I keep leftovers?
Leftovers can be stored in the fridge for up to 5 days. Just ensure they are well covered!
Can I add more mint flavor?
Absolutely! You can incorporate mint extract into the cream cheese mixture or use more crushed mint Oreos for an extra minty kick.
Final Thoughts
This Heavenly Mint OREO Dessert is not only simple and fun to make but also incredibly versatile. Feel free to customize it with different flavored cookies or toppings to suit your taste. Whether you’re hosting a gathering or simply treating yourself, this no-bake pie will surely impress everyone who tries it!

Heavenly Mint OREO Dessert
- Total Time: 0 hours
- Yield: 12 servings 1x
Description
Indulge in the delightful layers of our Heavenly Mint OREO Dessert, a no-bake pie that perfectly marries rich chocolate pudding with the refreshing zing of mint. This easy-to-make dessert is ideal for any gathering, from family celebrations to casual get-togethers. With its creamy texture and vibrant colors, it’s sure to impress guests of all ages. Preparation takes just 20 minutes, and after a couple of hours in the refrigerator, you’ll have a showstopper that’s as pleasing to the eyes as it is to the palate. Customize it with your favorite toppings for an extra burst of flavor!
Ingredients
- 2 small packages instant chocolate pudding
- 3 ¼ cups milk
- 1 package cream cheese (room temperature)
- 1 cup powdered sugar
- 2 containers whipped topping
- 1 package mint Oreos
- ½ cup melted butter
- Green food coloring
Instructions
- In a large bowl, whisk together the instant chocolate pudding and milk until set.
- In another bowl, beat the cream cheese and powdered sugar until smooth.
- Fold in one container of whipped topping and green food coloring into the cream cheese mixture.
- Crush mint Oreos in a zipper bag with a rolling pin.
- Mix half of the crushed Oreos with melted butter and press into the bottom of a baking dish.
- Spread the cream cheese mixture over the crust, followed by the prepared chocolate pudding layer.
- Top with the second container of whipped topping mixed with green food coloring.
- Sprinkle remaining crushed Oreos on top and chill for at least two hours before serving.
- Prep Time: 20 minutes
- Cook Time: N/A
- Category: Dessert
- Method: No-Bake
- Cuisine: American
Nutrition
- Serving Size: 1 slice (90g)
- Calories: 280
- Sugar: 24g
- Sodium: 200mg
- Fat: 17g
- Saturated Fat: 10g
- Unsaturated Fat: 5g
- Trans Fat: 0g
- Carbohydrates: 30g
- Fiber: 1g
- Protein: 3g
- Cholesterol: 30mg

Leave a Comment